THIS ARTICLE MAY CONTAIN AFFILIATE MARKETING LINKS! IN CASE YOU MAKE A PURCHASE THROUGH ONE OF THE LINKS, WE'LL GET A SMALL COMMISSION. WITH NO EXTRA CHARGES TO YOU. THANKS!!
Table of Contents
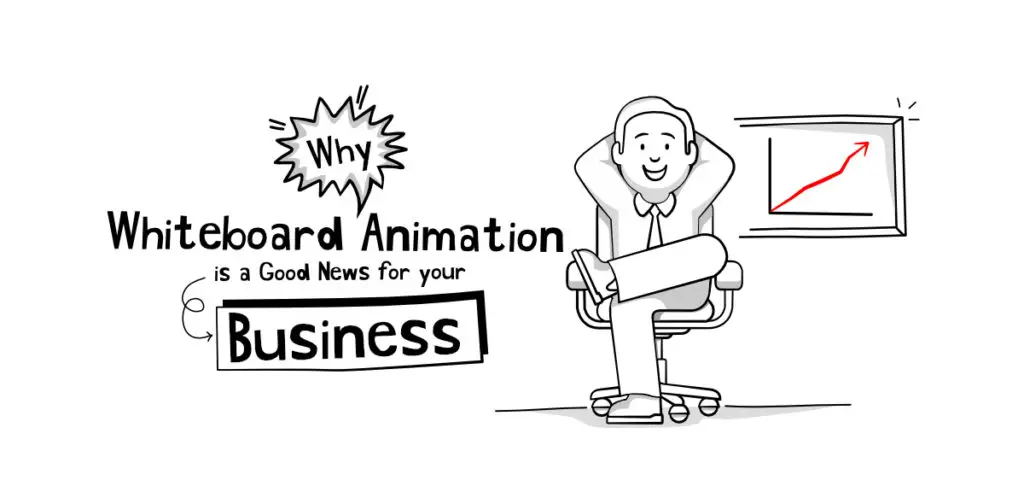
Have you at any point thought about how GIFs are made? In this article, you will learn the process involved in making animation on photoshop and creating GIFs. Thus, you will figure out how to utilize the timeline, a feature present in Photoshop. Let’s, get started,
How to make an Animation on Photoshop
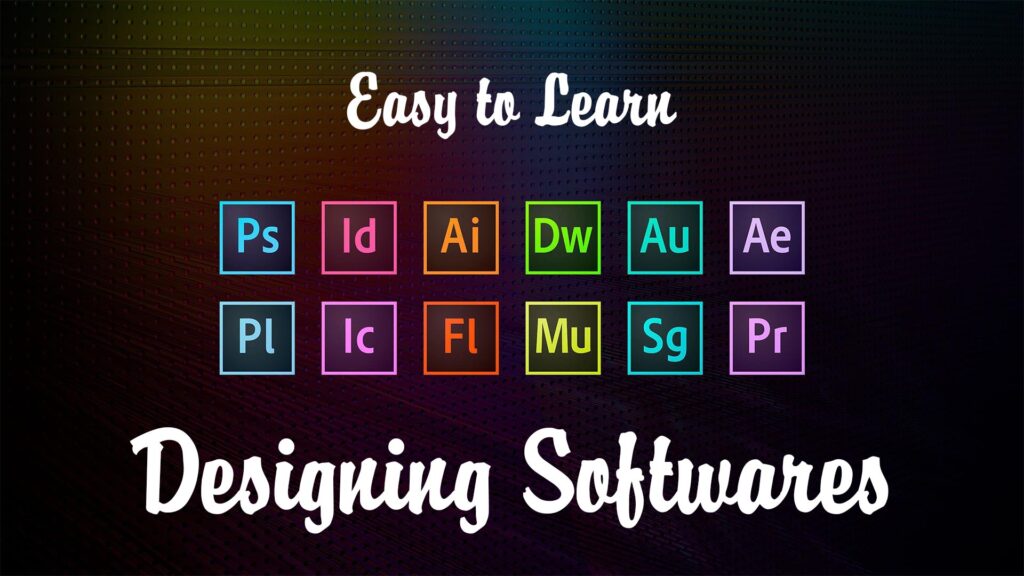
Adobe Photoshop is a raster software and is mainly used for image editing, image manipulation, and so on. It is also used for creating digital art, and digital painting. But photoshop can be used for creating animations. You can easily create simple GIFs and looping animations in photoshop. And various artists use it to even create more complex animation works by using video editing software like Adobe After Effects, and Adobe Premiere. Below we have included two simple animation examples that can be easily made in photoshop.
Text with Animated Glow Effect
Step 1.
Start by creating a New File (Ctrl+N) with a document size of 800 x 500 pixels (you can make the document according to your preference also). Fill the background with your preferred color. Now go to the menu Layers-Layer Style-Gradient Overlay (Layer > Layer Styles > Gradient Overlay). And, apply the suggested settings: Style Radial(Radial), color from black (#000000) to blue (#54799b) to use in the middle.
Step 2.
Make another layer and name it Noise Layer. Pick the Fill Tool (Paint Bucket Tool) and fill the layer that you just created with a dark color, you can use this code for the color (#231f20). Select and leave the Noise layer as the Active layer and go to the Menu Filter – Noise – Add Noise (Filter > Noise > Add Noise). In the settings dialog box, set the values as follows: Effect: 3%, Uniform distribution(Uniform), and click OK. On to the next step.
Step 3.
Press the keyboard shortcut (CTRL +U), and in the color correction settings dialog box that shows up, make the following changes: Saturation(Saturation) 100 percent, change the blending mode of the layer to Soft Light.
Step 4.
Now add any text you want to use for creating the effect. In Layer Styles, use Stroke. Select the stroke size as per your choice. Now rasterize text with the Stroke style. In order to make it, remove the Fill from the text layer to 0%, convert that layer to a smart object, and then rasterize it.
- Easy Guide to learn 12 Animation Principles
- What Jobs can you get with an Animation Degree?
- 18 Top Animation Software
Step 5.
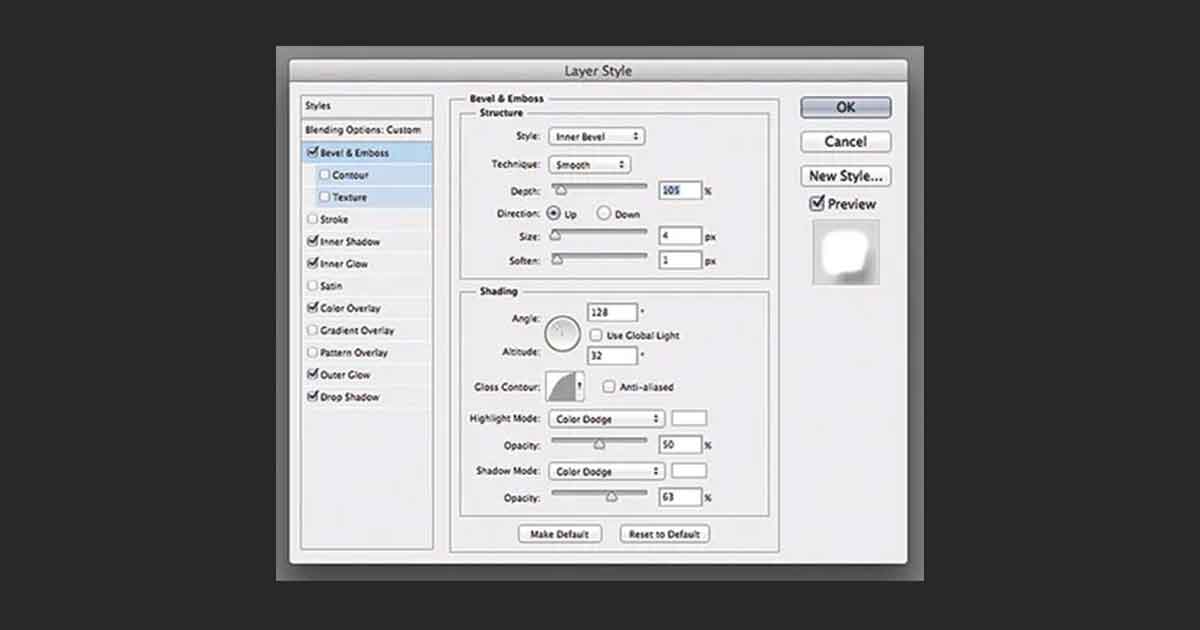
During this step, we’ll make a Glowing text effect by utilizing Layer styles. Double-click on the layer to open up the style settings window. Use the instructions below to modify Layer styles.
- Bevel, and Emboss:- Select the first radial Bevel and Emboss. In the settings select the following, Style: Inner Bevel, Technique: Smooth, Depth: 105%, Direction: Up, Angle: 128 degrees, Altitude: 32, Highlight Mode: Color Dodge, Opacity: 50%, Shadow Mode: Color Dodge, and Opacity: 63%.
- Inner Shadow:- Now select the radial of Inner Shadow. And make the following changes, Blend Mode: Color Dodge, Opacity: 44%, Angle:180 degrees, Distance: 1, Choke: 0, and Size: 7.

- Inner Glow:- Move to the Inner Glow radial and select it. And make the following changes in the settings, Blend Mode: Color Dodge, Opacity: 60%, Noise: 0, Technique: Softer, Source: Center, Choke: 0, Size: 15.

- Color Overlay:- Select the Color Overlay radial and make the following changes, Blend Mode: Color Dodge, and Opacity: 20%.

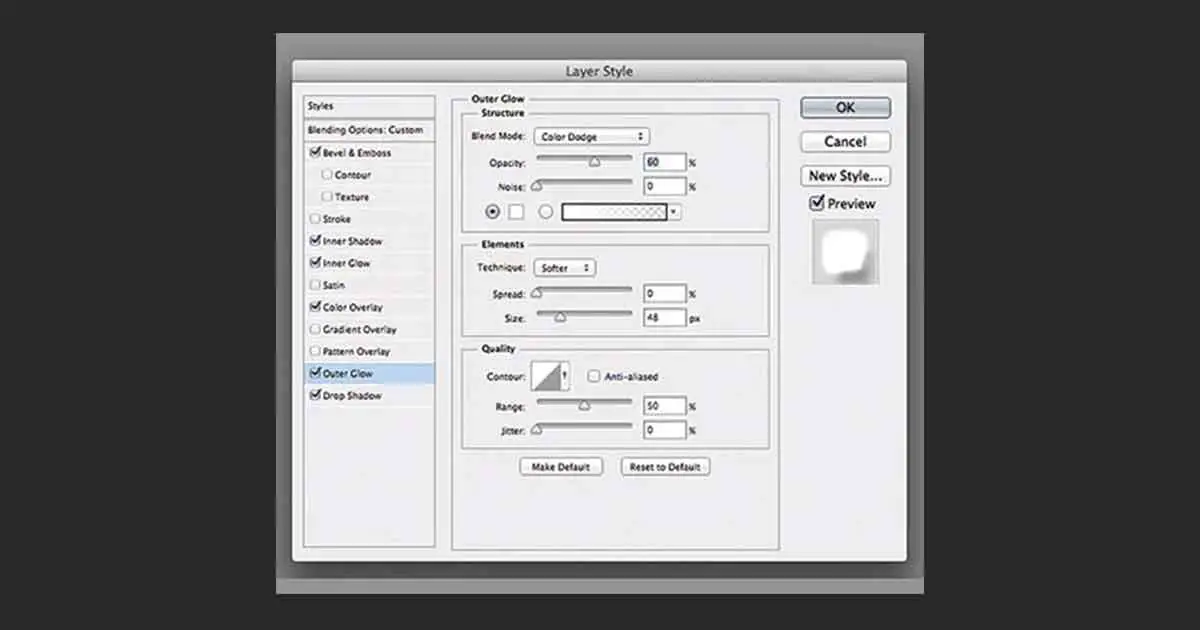
- Outer Glow:- Go to the Outer Glow radial and select it. And now make the following changes in the settings, Blend Mode: Color Dodge, Opacity: 60%, Technique: Softer, Spread: 0, and Size: 48.
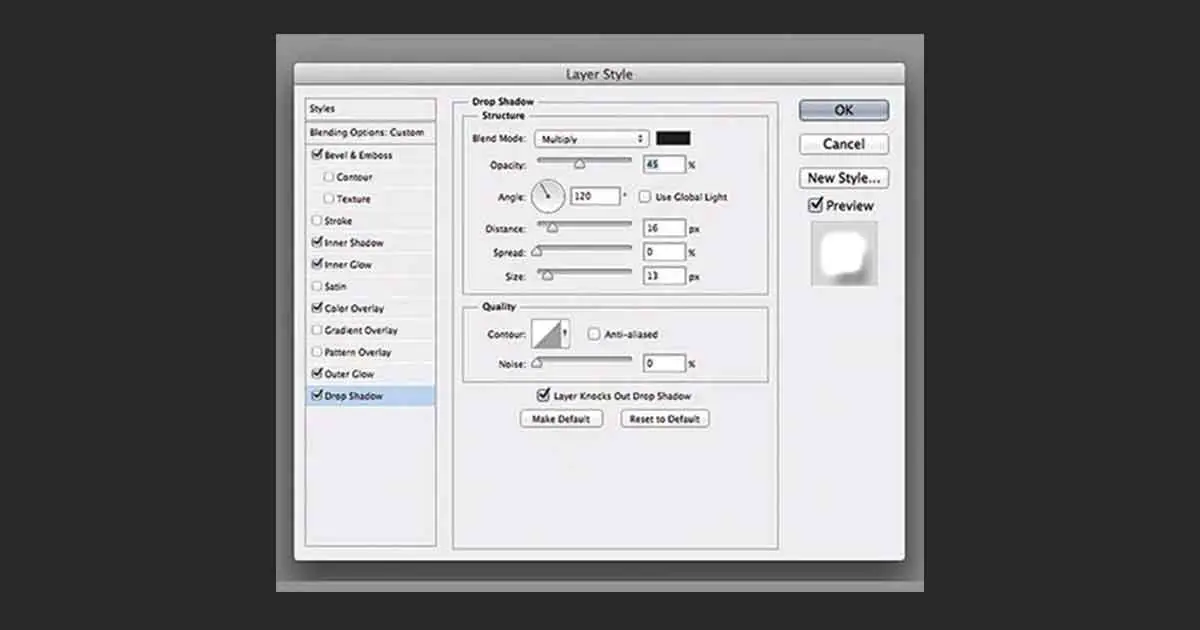
- Drop Shadow:- Lastly, select the Drop Shadow radial. And make the following changes in the settings, Blend Mode: Multiply, Opacity: 45%, Angle: 120 degrees, Distance: 16, Spread: 0, and Size: 13.
Step 6.
Whenever you are finished making lighting effects utilizing Layer Styles, go to the Layers, and lessen the value of that layer fill to 0%.
Step 7.
Now copy the layer you made in step 5, and deselect all layer styles on this duplicate layer. And only reconfigure the following settings in it,
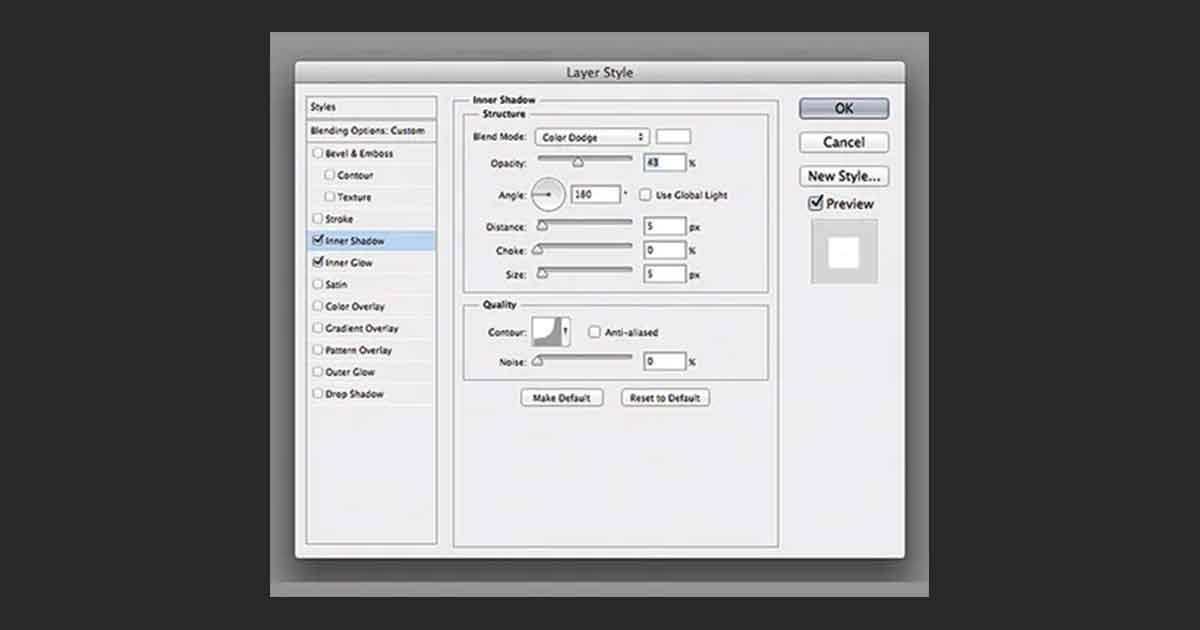
- Inner Shadow:- In the Inner Shadow settings make the following changes, Blend Mode: Color Dodge, Opacity: 43%, Angle: 180 degrees, Distance: 5, Choke: 0, and Size: 5.
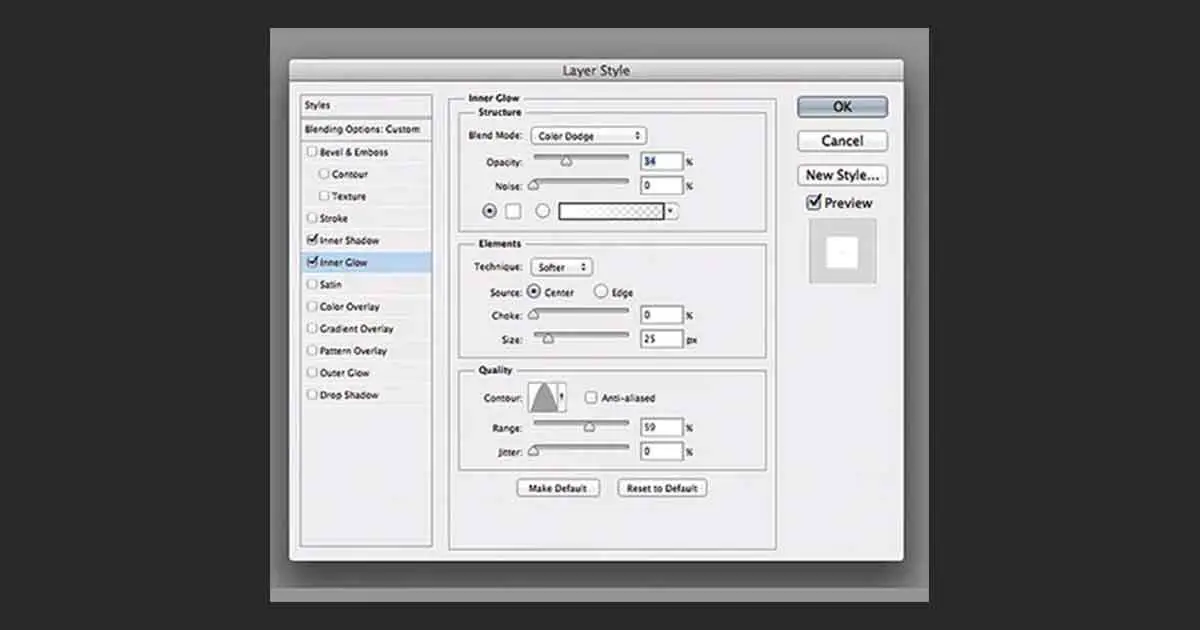
- Inner Glow:- And in the Inner Glow settings make the following changes, Blend Mode: Color Dodge, Opacity: 34%, Technique: Softer, Source: Center, Choke: 0, and Size: 25.
Step 8.
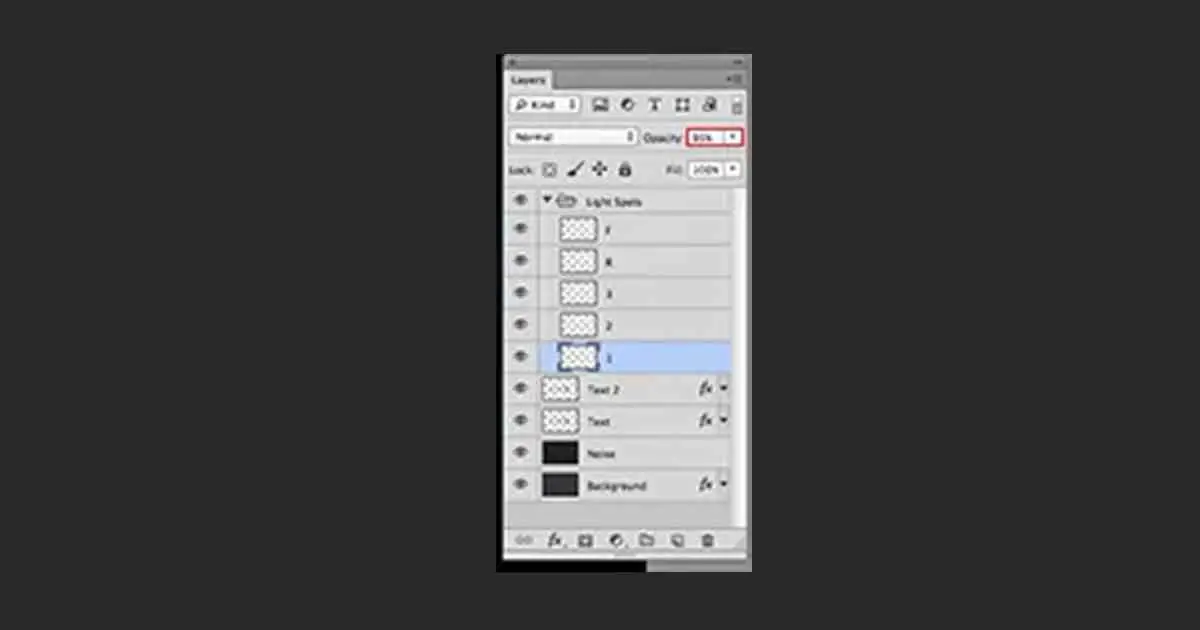
It’s time to start making the moving light spots. Make 5 layers over the current ones, and rename them according to the alphabet used in your text. For example, if the text is 123AB then the layers should be named 1, 2, 3, A, and B. So you have your own text, make, and name layers as per your letters. Now group these layers into a new group and give it the name Light Spots, and change the blending mode to Color Dodge.
Step 9.
Select the Brush Tool, select Soft brush, set Opacity to 95%, and with a white tone, draw dots (light spots) on the text. Each letter has a different light spot on its own layer. Remember to make the light spots on the layers in the group according to their respective name.
Step 10.
Now go to the Window – Timeline menu (Window > Timeline). You will see that your layers are as of now already on their left side. Select every one of the five light spot layers that are in the Light Spots group, and ensure that the current time pointer (blue slider) is at frame zero. Now on each layer in the Light Spots group, with keeping them active, click on the Position option to make a keyframe. To open the timeline, press the button Create video timeline, and every one of your layers will be loaded into the timeline. A similar layer or group will be chosen there as it is selected in the layers panel.
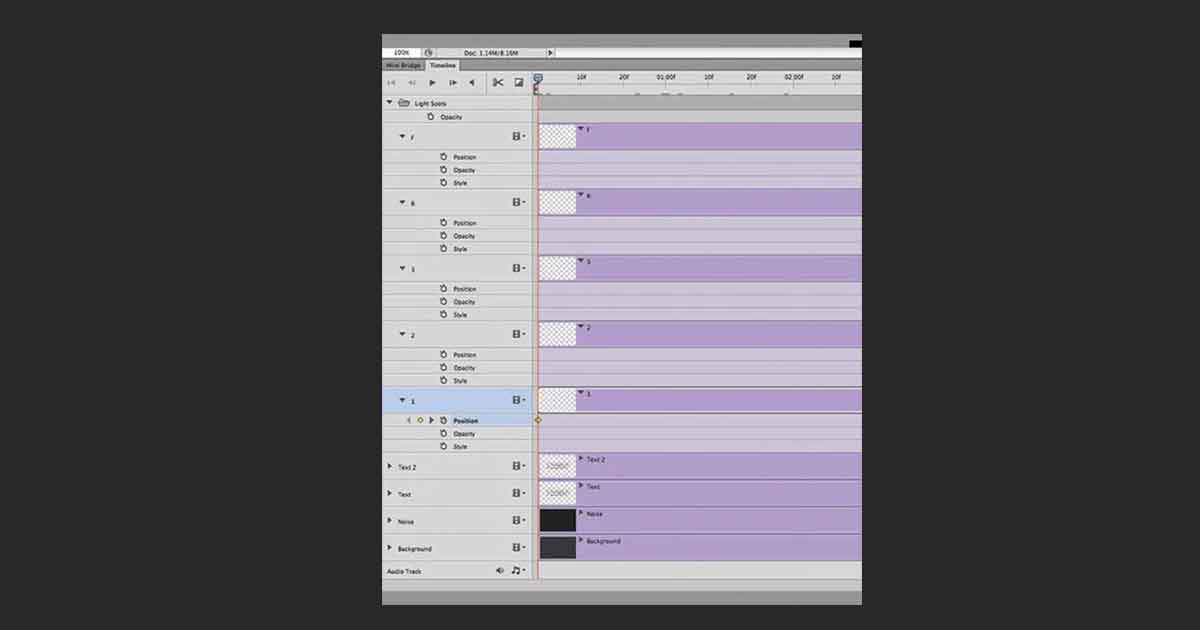
Step 11.
Set the time indicator marker (blue slider) to 01:00 Frame, and move the layers with light spots along the way comparative with the outline of the letter to create movement.

Step 12.
This is what the initial position will resemble the light spot on the target letters. Move the ongoing time indicator marker on the scale and move the layers with light spots, making keyframes. Continue dragging them until you’ve wrapped up moving the pointer over the whole letter of every text layer.
After doing so your glow effect animation will be complete and in order to see it in action just click on the play button on the timeline. In order to export your animation go to Go to File > Export > Save for Web then select GIF and hit save.
Animating a Simple Character
Let’s get started by getting an image of a character with its hands out. So, we animate it and make the character wave. But, before starting you should remove any background from the character image, or if it is in PNG format then you have no need to do it. Get your character and get started,
Step 1.
First, you really want to the Timeline in Photoshop. For this, we go Window >Timeline.
Step 2.
To make the arm of the character move, we want to remove it and set it in different positions. In order to cut the hand, you can use the Lasso tool. And make a duplicate of the hand with the shortcut Ctrl+J, and work with the duplicate. We don’t use the original one.
Now, cautiously select the hand from the original image, and cut it out by deleting it, or by simply erasing it.
Step 3.
And now we embed the previously copied hand and place it in various positions. The hand will be embedded into new layers, to suit the requirements of the animation.
Step 4.
It’s ideal to use the Eraser tool to tidy up the hand a little bit, making it look more normal. You can even skip this step. As it’s not significant, since the main thing for us is to figure out how to make an animation on Photoshop.
Step 5.
Now we start working with the timeline. In each frame, we just incorporate the layers we really want. For instance, in Frame 1 we really want our main image, and for our situation the layer at the bottom and above the background layer. Again, we make another layer, in the new frame, we enable a different layer. For example the duplicate layer of the hand position and Layer 1. We repeat this process until all the hand position layers are individually active on different frames.
Step 6.
Set the frame delay. It dictates the period of time after which the next image, or frame will be displayed.
Step 7.
Now for the final step, we will save the animation as a GIF. In order to export the GIF go to File > Export > Save for Web then select GIF and hit save.