THIS ARTICLE MAY CONTAIN AFFILIATE MARKETING LINKS! IN CASE YOU MAKE A PURCHASE THROUGH ONE OF THE LINKS, WE'LL GET A SMALL COMMISSION. WITH NO EXTRA CHARGES TO YOU. THANKS!!
In the vivid world of animation, idea visualization plays a crucial role in breathing life into imaginary characters and scenes. Storyboarding, a pivotal aspect of this process, involves mapping out the storyline of an animation piece, meticulously detailing each shot to provide a visual representation of the narrative. Not only is an effective storyboard an animator’s blueprint, but it also serves as a communicative tool across all departments involved in an animation project.
A compelling storyboard should efficiently encapsulate the nuanced elements of storytelling which include, characters, dialogue, direction, and a distinct structure. Furthermore, inculcating the ability to discern and steer clear from common storytelling pitfalls can surely elevate the quality of your storyboard. However, a storyboard is not just limited to sketched panels and annotations. The part technology plays in digitizing a hand-drawn storyboard and refining it further rounds off the skill set of contemporary storyboarding. Let’s explore How to Create a Storyboard for Animation.
How to Create a Storyboard for Animation
Understanding Storyboards
A storyboard is a visual representation of a story, similar to a comic strip, that is used as a guide for creating animations, film, and other media. It consists of sequential art that lays out the significant scenes of a narrative, including the key actions, dialogue, and transitions. The storyboard is an essential tool in animation as it allows you to visualize the scenes and better plan the timing, camera angles, and movements for your animation project.
Importance of Storyboards
The storyboard serves as a blueprint for the entire animation production process, helping creators to envision the movement of their characters, the arrangement of scenes, and the sequencing of the storyline. It’s a powerful tool for ensuring that everyone working on the project, from artists to animators, has a clear understanding of what is to be produced, thereby facilitating smooth communication and collaboration.
Storyboard Structures and Formats
There are different storyboard formats based on the requirements of the project. The most common ones include thumbnail storyboards, which are usually rough sketches depicting basic actions and movements; detailed storyboards, which include intricate artwork and specific details, and animated storyboards or animatics, which are basically moving versions of the storyboard.
The structure of a storyboard generally consists of a series of rectangular boxes, or panels, arranged in a sequence that represents the chronological order of the story. Project-specific details like the script, scene numbers, and other descriptions may also be included.
Storyboarding Elements
- Panels: These are used to represent each frame or scene in the story.
- Characters: Depict your characters by sketching them out or represent them using symbols or icons if necessary. Clearly show expressions and physical attributes.
- Dialogue: If there’s dialogue in your scene, include it beneath or within the panel. The dialogue should match the actions represented in the panel and be jotted down in an organized manner.
- Direction: Use arrows to indicate motion or camera movement. Include notes on how characters move or how the camera will pan or zoom.
- Timing: This indicates the duration of each scene or action and ensures that the pacing of the story is accurate.
Storyboard creation allows a purview of the final product without actual production. It enables error detection beforehand and allows for seamless production workflow. Remember, everyone involved should be able to understand your storyboard, so keep it simple and clean.

Photo by real_chance12 on Unsplash
Mastering Storytelling Techniques
Understanding Storytelling Principles
The process of creating a storyboard for animation starts with a profound understanding of storytelling principles. These pillars include plot structure, characterization, dialogue, pacing, and conflict. The ability to create an engaging narrative is not just about the story, but how it is presented. Think about what your characters want, the challenges they will face to get it, and how these challenges change them.
Choosing a Story Format
Story formats vary and it’s essential to choose a one that fits best with your story. Some popular formats include the three-act structure, the hero’s journey, and in medias res (starting in the middle). The three-act structure consists of setup, confrontation, and resolution. The hero’s journey follows a character through various stages such as the call to adventure, refusal of the call, crossing the first threshold, tests, allies, enemies, approach to the inmost cave, ordeal, reward, the road back, the resurrection, and return with the elixir. In medias res, on the other hand, often starts with a dramatic action then flashes back to explain how the characters got there.
Depicting Actions, Emotions and Transitions
In a storyboard, storyboard panels represent a specific moment in time. Within each panel, actions are typically portrayed using arrows and motion lines, showing either a character’s movements or the camera’s direction. Emotional storytelling is also pivotal. It’s crucial to use facial expressions, body language, and dialogue to portray how a character is feeling. Drawing skills are not as important as the ability to convey a clear message about what is happening emotionally and physically in each panel.
Successive panels show the passage of time. You might represent a long period by having characters change clothes or hairstyle, or by changing the light to indicate a different time of day. Transitions are another integral part of any storyboard, helping the story flow smoothly. Popular transitions include cut (an immediate change from one shot to the next), dissolve (where one shot fades out as the next shot fades in), match cut (a cut between two different objects with enough visual similarities as to seem connected), and jump cut (two sequentially placed shots that are identical or almost alike, creating an abrupt, disorienting effect).
Storytelling Mistakes to Avoid
Common storytelling mistakes include overly complex plotlines, weak or flat characters, a lack of conflict or stakes, predictable storylines, and poor pacing. To avoid these pitfalls, keep your plotline clear and straightforward. Develop your characters thoroughly, giving them strengths, flaws, and individual motivations. Make sure there is something important at stake in your story, and strive for an unexpected resolution. Pay attention to pacing too. If the action becomes too intense too early, the story can feel rushed. Conversely, if the story takes too long to develop, readers may lose interest.
- Best Colleges for Animation Degree
- Best 2D Animation Courses Online
- Best Animation Books for Beginners

Visualizing and Sketching Your Storyboard
Visualizing Your Storyboard
Begin by visualizing the story that you want to tell. This includes the setting, characters, and how you want the plot to unfold. Think of it like a film playing in your head. Every scene should be crisp and clear. Each gesture, each expression, and each movement should contribute to the narrative of the story. Note these details down to use as a reference when you start sketching.
Creating Thumbnail Sketches
A storyboard starts with thumbnail sketches. These are simple, quick drawings to block out the layout of your story. Each thumbnail represents a separate scene or shot in your animation. Despite being roughly done, thumbnails should capture the essence of the scene, including crucial character positions, important props, and the general surroundings.
Translating Ideas into Illustrations
Once your thumbnails are complete, it’s time to translate your ideas into more detailed illustrations. Remember, you are visually representing a story, so your illustrations should portray both the actions and emotions of your characters. Don’t concern yourself with creating perfect drawings. Stick figures and basic shapes can just as effectively communicate your vision.
Importance of Perspective
The perspective of your illustration greatly impacts the feel of your scene. For instance, a bird’s-eye view can suggest dominance or vulnerability, while a worm’s-eye view can convey a sense of immensity or intimidation. Experiment with different perspectives to see what works best for your story.
Understanding Angles and Framing
Angles and framing are very important in visual storytelling as they set the stage for the viewer. Wide shots can be used to depict an area or setting, whereas close-ups can highlight a character’s emotions or reactions. Consider the purpose of each scene when deciding on the camera angle and frame.
Time to Ink and Clean Up
Once you’re satisfied with the penciled sketches, it’s time to ink them. Ink over your pencil sketches with a black pen or marker, which provides clarity and makes your drawings more dynamic. After inking, erase the pencil marks for a clean, finished storyboard.
Remember to remain flexible with your storyboard; it’s not set in stone.
As you progress, you may find the need to change or alter your initial ideas to better portray your story. The key is to communicate your vision as clearly as possible, using all the visual tools available to you.

Digitizing and Polishing Your Storyboard
Step 1: Choose the Right Digital Software
A critical choice you should make is deciding on the right digital software for your project. Several storyboard applications and programs can come in handy for animators, ideal for both beginners and seasoned professionals. Some popular examples are Storyboarder, Photoshop, Toon Boom Storyboard Pro, or Celtx. Choose one that suits your skill level and required functionality.
Step 2: Scan or Import Your Drawings
Once you’ve chosen your software, the next stage is to import or scan your storyboard sketches into the program. Most storyboard software has a feature that allows you to upload images directly into it, but if that’s not enough, you can use a scanner to digitize your sketches. Remember to use high-resolution settings to retain as much detail from your original drawings as possible.
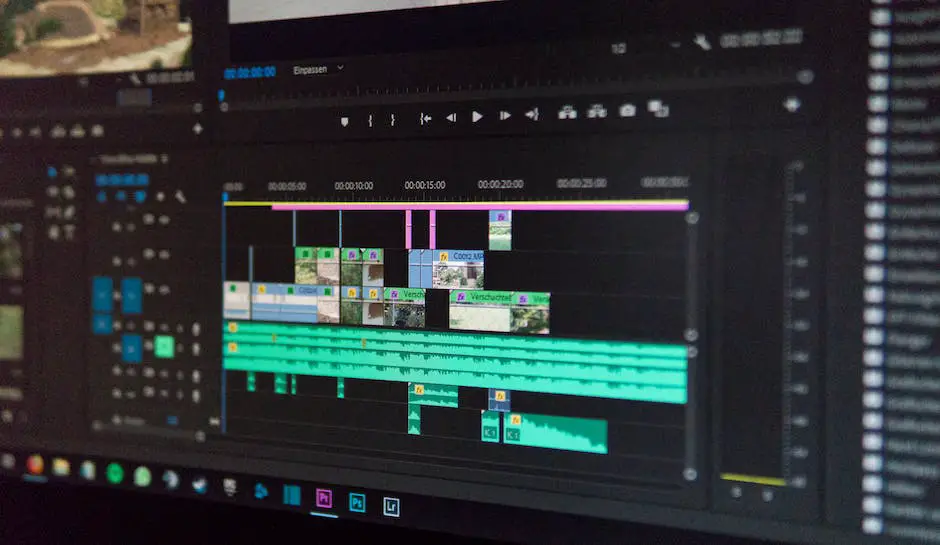
Step 3: Refining and Enhancing
After your drawings are in the digital platform, it’s time to refine and enhance them. Your software will typically offer a range of tools for you to use, such as pen, pencil, paintbrush, and eraser, among others. Use these tools to trace over your scanned images, clean up rough edges, and make any necessary adjustments. You can also add more details to your storyboard at this stage.
Step 4: Editing and Finalizing
The editing stage is where you fine-tune your storyboard and get it ready for final presentation. You can make small tweaks to your frames’ arrangement, add text annotations for additional context, and color-code different scenes or characters for ease of understanding. This stage might involve several iterations of feedback and revisions until you’re confident that the storyboard communicates your animation story effectively.
Step 5: Adding Narrative Elements
After finalizing the visual elements, it’s worth considering some narrative enhancements. Many storyboard tools allow you to add dialogue, scene descriptions, or even sound cues. These additions can help communicate your narrative more effectively, setting the mood, and giving a stronger sense of what the finished animation will look like.
Step 6: Export and Share Your Storyboard
Once you are satisfied with your digital storyboard, save and export it in the appropriate format for sharing. Print or digital forms might include PDF files for easy sharing and viewing, especially if involving others for feedback. This document will serve as the blueprint for your animation, guiding you or your animation team through the production process.
Storyboarding is a creative journey where the artist transforms abstract ideas into well-structured, concrete, and visually appealing concepts. The focus extends beyond merely sketching to mastering storytelling techniques and bringing concepts to life using technology. As you learn to effectively illustrate character emotions, panel transitions, and critical story beats, you’ll grow to appreciate the nuances of visual storytelling.
As a storyteller, employing digital tools to refine your sketched ideas can not only enhance the quality of your pieces but also improve your adaptability in the dynamic animation industry. Engage with the possibility of learning, unlearning, and relearning along the way, knowing every storyboard you create is a unique manifestation of your growth as an animator and visual storyteller.