THIS ARTICLE MAY CONTAIN AFFILIATE MARKETING LINKS! IN CASE YOU MAKE A PURCHASE THROUGH ONE OF THE LINKS, WE'LL GET A SMALL COMMISSION. WITH NO EXTRA CHARGES TO YOU. THANKS!!
Table of Contents
Adobe Illustrator is the industry standard for designing vector-based visual content. You can easily create stunning logo designs for any business, or organization by using Illustrator. And if you are looking for an easy guide to follow and to learn How to Make Logo on Illustrator? then look no further. We have got your back. In this article, we will go over each step required for designing a logo using illustrator.
But before anything else how about we talk about the logo first. Well, a logo is a symbol made up of color, shapes, and icons to communicate the business, or brand values. So, having a great logo is a must for any organization. With keeping this in the mind let’s get started,
How to Make Logo on Illustrator?
Things that we will go over are listed below:-
- Research
- Inspiration
- Sketching your Idea
- Scan your initial design
- Time to Use Illustrator
Research

First and foremost, you must start out by doing research whether you are working on a personal, or a client project. It is very important to do proper research for any type of design project. Proper research informs you about the competition, trends of the market, and so on. It helps in laying a solid foundation for the project. In logo design research helps in determining keywords, style, informs about do’s and dont’s by analyzing the competition.
Inspiration

In order to get inspired, we are gonna browse the internet. More specifically websites like Behance, Instagram, and Pinterest. Here look through different artists, and designers’ work and pick out the works that attract your attention. Collect all the data from the research and take all the designs that you pick out. And stick them up at an actual, or digital pinboard. By doing so you have created a Mood Board for yourself.
During this step you will get a clear idea about what type of logo you want, its image will become clear in your head.
Sketching your Idea

Take out a piece of paper and pencil and start sketching out your ideas. Don’t think about good or bad ideas just get everything you came up with on the paper. Now pick out the one you like the most and pay attention to them. Draw the hand-picked ones again and try to get rid of the mistakes and find room for improvement. This way you will have a more refined version of the logo.
Scan your Initial Design
Now is the time to get the design from paper to computer. If you have a scanner use it. If not you can also use your phone camera to take picture of the design then transfer it to the computer.
- Beginners Guide: How to Design My Own Logo?
- Make it yourself: Tips for Logo Design
- How to make Logo with Photoshop
Time to use Illustrator
Finally, it’s time to get started on illustrator. Open illustrator on your computer. And let’s get started,
1. Setting up your Document
First of all, you will have to create a new document to start with. Click on the CREATE NEW button on the left-hand side. Now, under the PRESET DETAILS type the name of the project. Below that in the WIDTH and HEIGHT type 1000 and set the units to PIXEL. After this just click on the CREATE button at the bottom in order to finish creating a new document.

When you get to the next screen it’s time to import the scan of the design into the illustrator. Simply select the scanned file, or the picture of the design and DRAG-AND-DROP it in the illustrator.
2. Get started with Shapes
For the sake of simplicity and ease of use try to stick with the shapes while working on the design. Even some shapes are more than capable of producing a great logo. There are various shapes to choose from such as,
- RECTANGLE TOOL,
- ELLIPSE TOOL,
- POLYGON TOOL,
- STAR TOOL, and
- LINE SEGMENT TOOL.
By default, the rectangle tool is selected in the toolbar. And to access the other options just LONG-CLICK on the tool to see the other options. Use the shapes to complete the designs.
For now, try to stick with the black color. And don’t introduce colors in the design as adding the color at the start can be distracting.
3. Use the Pen Tool
You may have some elements in the design that can not be made with the shapes. If that happens then use the PEN TOOL to track over the design and create the desired shape. To select the pen tool you either directly select it from the toolbar, or press the P shortcut key to select it.
It is one of the tools that is hard to master but with the pen tool you can create any design in illustrator.
4. Add Text
After getting done with the designing part. It is time to add text to the logo. Text can be the name or tagline of the business. While working with the text it is important to pay close attention to it. Text in the design should be used in such a manner that it elevates the design and does not look forced.
In order to type you will have to select the TYPE TOOL. You can either press the T shortcut key or can select it directly from the toolbar.
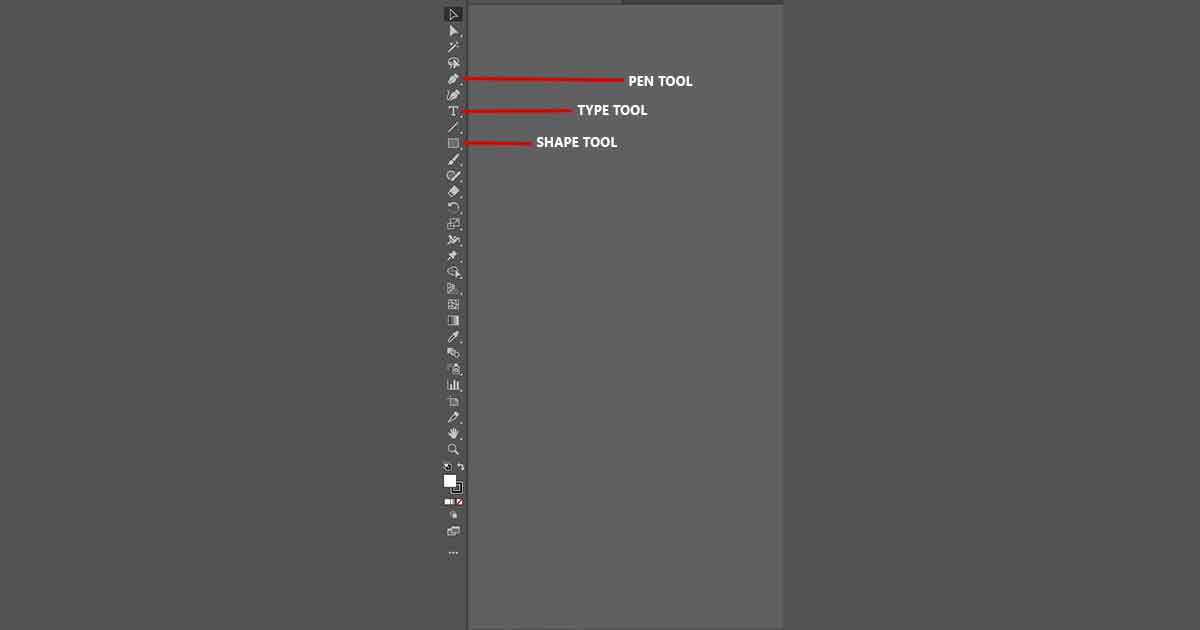
5. Add Colors
Now that we have added text in design the design is almost complete. It’s time to introduce colors in the design. Use the color combination that you picked. First of all just simply use solid colors in the design. And you can also use a gradient for adding more impact to the design. By using gradient various effects can be made and achieved easily.
6. Mix and Match Different Elements
After coloring the design, make some copies of it and place them next to each other. The main goal of this is step is to try out different combinations of things in the design. For example, use only solid colors in one iteration, use only gradients in one, try different placement for the elements, and so on. By doing show you can take the completed design one step further and can explore more options within the design.
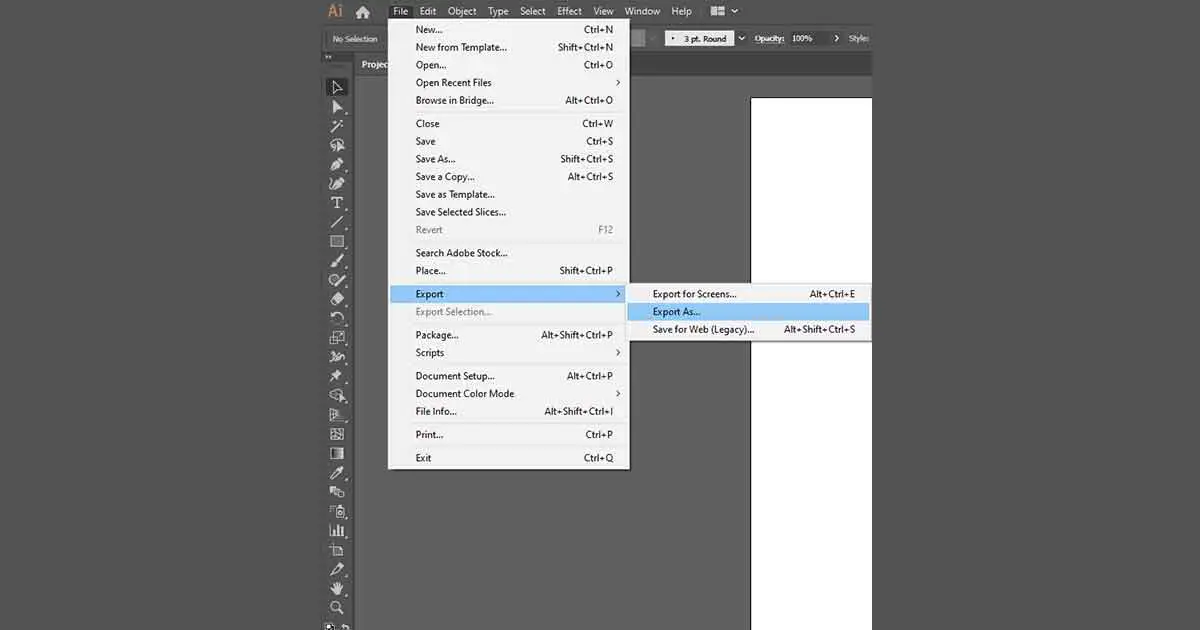
7. Exporting the files
This is the last and final step of the process. It’s time to export the finished design. Go to FILE > SAVE AS and save the file at your desired location. After saving the file export the logo in a PNG file. Again go to FILE > EXPORT > EXPORT AS and select png from the drop-down menu and click on export.
Congratulation, you have successfully created a logo on illustrator. Making a logo is a long process but if you look at it as a problem to be solved it becomes more enjoyable. Practice more, create a few more logos using these steps as a guideline, eventually, you will be able to develop your own workflow. And now you know How to Make Logo on Illustrator.