THIS ARTICLE MAY CONTAIN AFFILIATE MARKETING LINKS! IN CASE YOU MAKE A PURCHASE THROUGH ONE OF THE LINKS, WE'LL GET A SMALL COMMISSION. WITH NO EXTRA CHARGES TO YOU. THANKS!!
In the field of 3D modeling, 3D animation, architectural visualization and design, the power of rendering cannot be overstated. SketchUp, with its intuitive interface and robust modeling capabilities, has emerged as a favored tool among professionals and enthusiasts alike. However, it’s in the rendering phase where SketchUp truly shines, transforming simple models into stunning visuals that breathe life into blueprints and sketches. Rendering in SketchUp is not just about adding textures and lighting; it’s an art form that requires a keen eye for detail, a deep understanding of materials, and a mastery of the software’s expansive toolkit.
Whether you’re aiming to create photorealistic images that capture the play of light and shadow, or stylized illustrations that convey the mood of a space, SketchUp’s rendering capabilities allow for a spectrum of possibilities that can elevate any project. As we delve deeper into the intricacies of rendering within SketchUp, we uncover the techniques that enable artists and designers to depict reality with astonishing accuracy or conjure visions that push the boundaries of imagination. This article will explore the transformative process of rendering in SketchUp, guiding you through the journey from model to masterpiece.
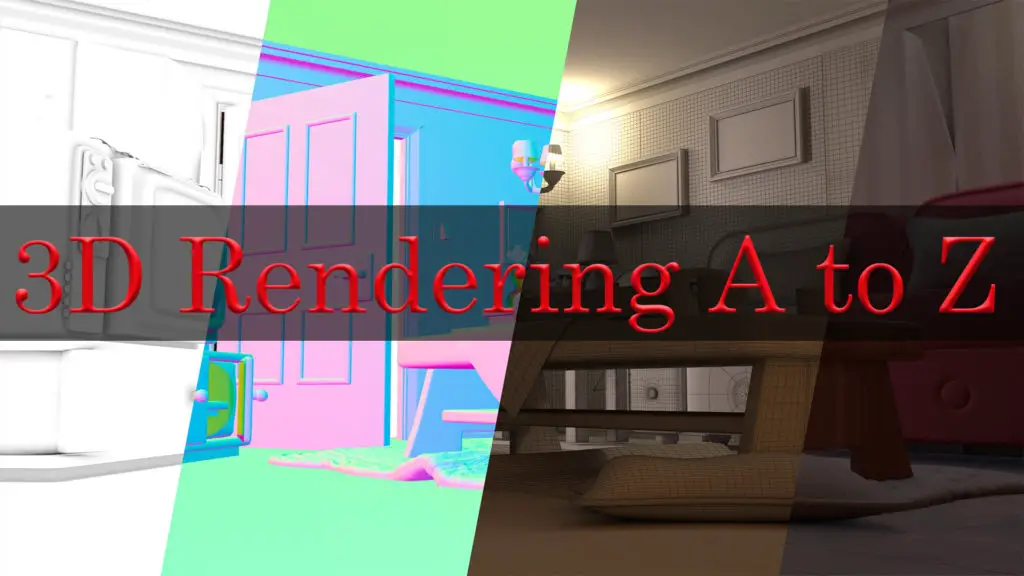
Rendering in SketchUp
Rendering in SketchUp is a transformative process that elevates a simple 3D model to a visual masterpiece, imbued with textures, lighting, and realism that leap off the screen. At its core, rendering is the art of creating two-dimensional images or animations from a three-dimensional model created within SketchUp. It’s a complex interplay of light, shadow, reflection, and refraction, meticulously calculated to mimic the behavior of light in the real world. As such, rendering can turn a SketchUp model into a lifelike scene that can convey the designer’s intent, showcase a project’s potential, or communicate ideas more effectively.
The magic of rendering lies in its ability to simulate materials and surfaces with astonishing accuracy. From the roughness of concrete to the sheen of polished wood, every texture can be represented to reflect its real-world counterpart. This is achieved through the careful mapping of textures and the use of bump maps and specular maps that give surfaces depth and detail.
Lighting plays a pivotal role in rendering. It involves setting up light sources in the virtual environment that mimic natural or artificial lighting, casting shadows and highlights that give the scene depth and dimension. The interplay of light and shadow is what gives rendered images their sense of space and form.
Rendering also includes the use of cameras within SketchUp to frame the scene just right, capturing the desired perspective and focal points. Camera settings such as field of view, depth of field, and exposure are adjusted to get the perfect shot, much like in photography.
Advanced rendering techniques can add effects like lens flare, fog, or depth of field to create mood and atmosphere. These effects can help tell a story, evoke an emotion, or guide the viewer’s eye to the most important parts of the scene.
Ultimately, rendering in SketchUp is about bringing designs to life. Whether for architectural presentations, product design, or animation, rendering is the final, crucial step that transforms a model into a compelling visual narrative that resonates with audiences and clients alike. It’s a skill that combines technical prowess with artistic vision, and when done well, it can turn a good design into a great one.
Introduction to Rendering with SketchUp
Rendering in SketchUp is an essential technique for architects, designers, and hobbyists looking to bring their three-dimensional models to life. It is the process of applying realistic lighting, materials, and textures to a SketchUp model to create a still image or animation that reflects what the final product will look like in the real world. This step is crucial for visualizing design concepts, presenting ideas to clients, or creating compelling visuals for marketing purposes.
With the aid of rendering, a SketchUp model transcends its wireframe structure, gaining depth, color, and realism. The result is a vivid representation that can simulate various lighting conditions, material properties, and environmental effects, providing a glimpse into the creative vision behind every project. Whether it’s a sun-drenched living room, a bustling cityscape, or a serene landscape, rendering with SketchUp allows creators to showcase their designs in the most impactful way possible.
SketchUp Rendering: Tools and Techniques
At the heart of every breathtaking visual created in SketchUp lies a fundamental understanding of rendering tools and techniques. Rendering is the bridge between a conceptual model and a striking image that captures the viewer’s imagination. It begins with the model itself, where the geometry is crafted with precision. The next step is the application of materials and textures, which give surfaces their appearance and character. In SketchUp, this involves selecting from a rich library of textures or importing custom ones to achieve the desired look.
Lighting is another cornerstone of rendering. It involves placing virtual light sources within the scene to mimic natural or artificial light. The interplay of light and shadow is what gives a rendered image its depth and realism. SketchUp offers various lighting options, from simple point lights to sophisticated sun simulations that reflect the time of day and geographic location.
The use of cameras in SketchUp allows for the framing of a scene just as a photographer would, controlling perspective, composition, and focus. The camera settings are crucial for capturing the right angle and ensuring that the focal points are highlighted effectively.
Rendering plugins greatly enhance SketchUp’s native capabilities. These third-party tools offer advanced features like global illumination, caustics, and physically accurate materials. They often come with their own sets of tools and settings, allowing for a higher level of customization and control over the final image.
Finally, post-processing is the finishing touch that can make a rendered image stand out. This can involve adjusting contrast, saturation, and brightness, or adding effects like bloom, vignette, or lens flare. Post-processing can be done within SketchUp or using external image editing software.
Mastering these tools and techniques is essential for anyone looking to create professional-quality renders in SketchUp. With practice and experimentation, one can learn to manipulate these elements to produce images that not only represent the design but also evoke emotion and tell a story.
Understanding SketchUp Materials and Textures
Understanding materials and textures in SketchUp is pivotal for creating renders that are rich in detail and realism. Materials in SketchUp are essentially the ‘paint’ that brings surfaces to life, allowing users to simulate various finishes like wood, glass, metal, and fabric. Each material has properties such as color, texture, and reflectivity, which determine how it interacts with light and shadow within a scene. Textures, on the other hand, are images mapped onto the surfaces of a model to give it a specific appearance. They can represent intricate patterns, like the grain of wood or the weave of fabric, adding depth and authenticity to the render.
In SketchUp, applying materials and textures is a straightforward process, but mastering their use requires an understanding of UV mapping—the process by which a 2D image is wrapped around a 3D object. A Proper UV mapping setup ensures that textures which are to be applied are in alignment and can be applied correctly on complex geometries without stretching or distortion. Additionally, users can manipulate the scale and orientation of textures to match the real-world dimensions of the material being represented.
Advanced users can create custom materials and textures, importing high-resolution images and adjusting their properties to achieve the desired effect. This level of customization is crucial for achieving photorealistic renders, as it allows for the precise simulation of real-world materials.
Moreover, SketchUp’s material editor enables users to fine-tune the appearance of their materials, adjusting parameters such as opacity, glossiness, and bump mapping. Bump mapping is particularly useful for simulating the texture of surfaces without the need for complex modeling, as it creates the illusion of depth on a flat surface by altering the way light interacts with it.
In rendering, the quality of materials and textures can make or break the final image. They are responsible for conveying the tactile qualities of a space and contributing to the overall atmosphere. Whether aiming for a sleek, modern look with reflective surfaces or a rustic charm with weathered textures, understanding and utilizing SketchUp’s material and texture capabilities is essential for any designer looking to produce compelling visualizations.
The Role of Plugins in Enhancing SketchUp Renders
The integration of plugins into SketchUp has revolutionized the rendering process, offering users an expanded suite of capabilities that go beyond the software’s standard features. These plugins, developed by a community of passionate experts, serve as powerful extensions that can dramatically enhance the quality and efficiency of renders. They introduce advanced functionalities such as photorealistic lighting, atmospheric effects, and complex material simulations, which are essential for achieving high-end visualizations.
For instance, plugins like V-Ray and SU Podium bring to the table sophisticated rendering engines that provide artists with a plethora of options for light simulation, including global illumination, caustics, and HDRI support. These tools enable the creation of images so lifelike that they can be mistaken for photographs, capturing nuances of light and shadow with scientific precision.
Material plugins add another layer of depth to SketchUp renders. They allow for the creation and manipulation of materials with properties like subsurface scattering, which is crucial for rendering translucent materials like marble or skin. Texture plugins offer high-resolution, seamless textures that can be scaled and adjusted within the model, ensuring that every surface looks as close to the real thing as possible.
Environmental plugins help in simulating natural phenomena such as fog, rain, and grass, adding a sense of atmosphere and context to the scene. They can automate the placement of vegetation, people, and other elements, saving time and adding realism to the render.
Efficiency plugins streamline the rendering workflow, automating tasks such as batch rendering and camera animation, which are invaluable for large projects or when multiple iterations are required. They can also optimize the model for rendering, reducing the polygon count without compromising on detail.
In essence, plugins transform SketchUp from a modeling tool into a full-fledged rendering studio. They empower users to push the boundaries of creativity and realism, allowing them to convey their vision with greater clarity and impact. Whether it’s for architectural visualization, product design, or entertainment, the role of plugins in enhancing SketchUp renders is undeniable, making them an indispensable asset for any serious SketchUp user.
Rendering Styles: From Photorealism to Artistic Flair
Rendering styles in SketchUp are as diverse as the designers and artists who use the software, each bringing a unique vision to the virtual canvas. At one end of the spectrum lies photorealism, a style that strives to mimic reality with such precision that viewers might question whether they’re looking at a render or a photograph. This style is characterized by meticulous attention to detail, from the texture of materials to the subtleties of light and shadow. It requires a deep understanding of light physics, material properties, and camera settings, often achieved through high-end rendering plugins that offer advanced features like ray tracing and global illumination.
On the other end is artistic flair, where the goal is not to replicate reality but to interpret it. This style allows for more creative freedom, using SketchUp’s rendering capabilities to produce images that are expressive and evocative. Artists may opt for non-photorealistic rendering (NPR) techniques, which can resemble watercolor paintings, pencil sketches, or comic-like illustrations. These styles are less about technical accuracy and more about conveying a mood, an idea, or a concept. They can be playful, dramatic, or surreal, providing a visual narrative that goes beyond the physical attributes of the model.
Between these two extremes are hybrid styles that blend realism with artistic elements. Such renders might feature a realistic architectural model set against a stylized backdrop or incorporate abstract elements into a lifelike scene. These mixed styles can make a render stand out, offering a fresh perspective that captures the essence of a design while also showcasing the artist’s creativity.
Regardless of the style chosen, rendering in SketchUp is a form of storytelling. It’s about choosing the right techniques to convey the intended message, whether that’s the practicality of a building design or the atmosphere of an interior space. The style becomes a designer’s signature, a way to leave a personal imprint on their work and engage viewers on a deeper level. In the vast world of SketchUp rendering, the possibilities are limited only by the imagination, allowing for endless exploration and expression.
Conclusion
As we reach the conclusion of our exploration into the world of rendering within SketchUp, it’s clear that this powerful process is more than just a final step in visualization; it’s a gateway to infinite creative possibilities. Rendering transforms the stark lines and shapes of a 3D model into a vibrant, dynamic image that can convey the full intent of a design. It’s a blend of science and art, where technical precision meets creative expression.
The journey from a SketchUp model to a fully rendered image is both intricate and rewarding. It involves an understanding of light and materials, a mastery of the software’s tools, and an eye for detail. Whether you’re a seasoned professional or a passionate hobbyist, the ability to render in SketchUp is a valuable skill that can bring your designs to life and communicate your vision to the world.
In the ever-evolving landscape of digital design, rendering remains a crucial skill. It’s the language through which we share our ideas, the lens that brings our concepts into focus, and the bridge that connects the imagined with the real. As technology advances, so too will the tools and techniques at our disposal, promising even greater levels of realism and creativity.
So, whether you’re rendering a cozy cottage or a sprawling urban complex, remember that each click, each adjustment, and each rendering pass is a step towards creating something truly extraordinary. With SketchUp as your canvas and rendering as your brush, you have the power to create not just images, but visions that inspire, inform, and impress.
As we conclude, let’s embrace the challenges and opportunities that rendering in SketchUp presents. Let’s continue to push the boundaries of what’s possible, to learn and grow with each project, and to share our work with confidence and pride. The world of rendering is vast and varied, and it awaits your unique contribution. So go forth, render boldly, and let your designs shine in the light of their fullest potential.